Browsed by
Author: T_Baecker

Locales in Debian and Ubuntu

Locales in Debian and Ubuntu

Locales customize your system to languages and country specific settings.
On a single user system, you set up your locale at installation time and that’s it.
But if you need to support several different languages (e.g. an international ecommerce shop) you have to tweak your setup.

Command line tools, packages and configuration files

The locale command displays information about the current locale. The man page reveals more information:

When invoked without arguments, locale displays the current locale settings for each locale category (see locale(5)), based on the settings of the environment variables that control the locale (see locale(7)).

A locale is composed of several locale categories. When a program looks up locale dependent values, it does this according to the following environment variables:

$ locale
LANG=de_DE.UTF-8
LANGUAGE=
LC_CTYPE="de_DE.UTF-8"
LC_NUMERIC="de_DE.UTF-8"
LC_TIME="de_DE.UTF-8"
LC_COLLATE="de_DE.UTF-8"
LC_MONETARY="de_DE.UTF-8"
LC_MESSAGES="de_DE.UTF-8"
LC_PAPER="de_DE.UTF-8"
LC_NAME="de_DE.UTF-8"
LC_ADDRESS="de_DE.UTF-8"
LC_TELEPHONE="de_DE.UTF-8"
LC_MEASUREMENT="de_DE.UTF-8"
LC_IDENTIFICATION="de_DE.UTF-8"
LC_ALL=

You can find more information about the variables and locales in general at https://www.gnu.org/software/gettext/manual/gettext.html#Locale-Environment-Variables and https://help.ubuntu.com/community/Locale

Display a list of all available locales:

$ locale -a
C
C.UTF-8
de_DE.utf8
POSIX

Locales availabe for generation are configured in /etc/locales.gen
Just uncomment the locales you want to be available, then run the locale-gen command.

# This file lists locales that you wish to have built. You can find a list
# of valid supported locales at /usr/share/i18n/SUPPORTED, and you can add
# user defined locales to /usr/local/share/i18n/SUPPORTED. If you change
# this file, you need to rerun locale-gen.


# C.UTF-8 UTF-8
# aa_DJ ISO-8859-1
# aa_DJ.UTF-8 UTF-8
# aa_ER UTF-8

...

# de_CH.UTF-8 UTF-8
# de_DE ISO-8859-1
de_DE.UTF-8 UTF-8
# de_DE@euro ISO-8859-15
# de_IT ISO-8859-1
# de_IT.UTF-8 UTF-8
# de_LI.UTF-8 UTF-8

...

As an alternative, you could achieve the same result with:

$ sudo locale-gen fr_FR.UTF-8
Generating locales...
  fr_FR.UTF-8... done
Generation complete.

This will update the config file und generate the specified locale (fr_FR.UTF-8) in one step.

If you have a bunch of locales to generate the following shell snippet will help:

$ L="de_DE
de_DE.UTF-8
de_DE@euro
en_GB
en_GB.ISO-8859-15
en_GB.UTF-8
en_US.UTF-8
es_ES
es_ES.UTF-8
es_ES@euro
fr_FR
fr_FR.UTF-8
fr_FR@euro
it_IT
it_IT.UTF-8
it_IT@euro
nl_NL
nl_NL.UTF-8
nl_NL@euro"

$ for i in $L[*]; do
$  sudo sed -i s"/^# ${i}/${i}/g" locale.gen
$ done
 
$ sudo locale-gen
Generating locales (this might take a while)...
  de_DE.ISO-8859-1... done
  de_DE.UTF-8... done
  de_DE.ISO-8859-15@euro... done
  en_GB.ISO-8859-1... done
  en_GB.ISO-8859-15... done
  en_GB.UTF-8... done
  en_US.UTF-8... done
  es_ES.ISO-8859-1... done
  es_ES.UTF-8...^A done
  es_ES.ISO-8859-15@euro... done
  fr_FR.ISO-8859-1... done
  fr_FR.UTF-8... done
  fr_FR.ISO-8859-15@euro... done
  it_IT.ISO-8859-1... done
  it_IT.UTF-8... done
  it_IT.ISO-8859-15@euro... done
  nl_NL.ISO-8859-1... done
  nl_NL.UTF-8... done
  nl_NL.ISO-8859-15@euro... done
Generation complete.

The default locale is defined in /etc/default/locale

LANG=de_DE.UTF-8

To change the default, you can edit the file or use update-locale like so

$ sudo update-locale LANG=de_DE.UTF-8

The advantage of using update-locale ist that some basic checks are performed to ensure that requested settings are valid.

Conclusion so far: with the tools described above you can cherry pick how locales are setup.

Language packs

Important: language-packs only apply to Ubuntu and not Debian

On Ubuntu you can also install language-packs.
There are a lot of them, seperated into base and updates packages, for example:

language-pack-en: translation updates for language English
Translation data updates for all supported packages for: English
language-pack-en-base provides the bulk of translation data and is updated
only seldom. This package provides frequent translation updates.

$ sudo aptitude search "^language-pack-*"
p   language-pack-af               - translation updates for language Afrikaans
p   language-pack-af-base          - translations for language Afrikaans
p   language-pack-am               - translation updates for language Amharic
p   language-pack-am-base          - translations for language Amharic
p   language-pack-an               - translation updates for language Aragonese
p   language-pack-an-base          - translations for language Aragonese
p   language-pack-ar               - translation updates for language Arabic
p   language-pack-ar-base          - translations for language Arabic
p   language-pack-as               - translation updates for language Assamese
p   language-pack-as-base          - translations for language Assamese
p   language-pack-ast              - translation updates for language Asturian
p   language-pack-ast-base         - translations for language Asturian
p   language-pack-az               - translation updates for language Azerbaijan
p   language-pack-az-base          - translations for language Azerbaijani
p   language-pack-be               - translation updates for language Belarusian
p   language-pack-be-base          - translations for language Belarusian
p   language-pack-bg               - translation updates for language Bulgarian
p   language-pack-bg-base          - translations for language Bulgarian
p   language-pack-bn               - translation updates for language Bengali
p   language-pack-bn-base          - translations for language Bengali
p   language-pack-br               - translation updates for language Breton
p   language-pack-br-base          - translations for language Breton

...

If you install a language-pack, additional configuration is installed in /var/lib/locales/supported.d
For English this will look like this:

/var/lib/locales/supported.d/en

en_HK.UTF-8 UTF-8
en_DK.UTF-8 UTF-8
en_IN UTF-8
en_IL UTF-8
en_ZM UTF-8
en_ZW.UTF-8 UTF-8
en_NZ.UTF-8 UTF-8
en_PH.UTF-8 UTF-8
en_NG UTF-8
en_US.UTF-8 UTF-8
en_GB.UTF-8 UTF-8
en_AU.UTF-8 UTF-8
en_SG.UTF-8 UTF-8
en_BW.UTF-8 UTF-8
en_AG UTF-8
en_ZA.UTF-8 UTF-8
en_CA.UTF-8 UTF-8
en_IE.UTF-8 UTF-8

Independently from the settings in /etc/locale.gen all the locales in /var/lib/locales/supported.d/en are beeing generated.
Sweet Home – setup sudo, ssh and dotfiles

Sweet Home – setup sudo, ssh and dotfiles

When I build a new Linux host/Raspberry to play around, there are four basic things I always do first. No fancy automation, just quick and dirty manual labor:

  • install my favorite editor vim, make vim the default editor (optional)
  • add my ssh-key to authorized_keys for passwordless logins via SSH
  • configure sudo to avoid the password prompt when doing superuser stuff
  • clone my dotfiles git repo to setup my environment for convenient terminal usage

vim

Without vim I am lost.

# accept to enter the password for sudo once more:
sudo apt-get install vim

# make vim the default editor (optional)
sudo update-alternatives --set editor /usr/bin/vim.basic

ssh-key

I usually login with my password to accomplish the task. If there is a default password I change it.

cd ~
mkdir .ssh
touch .ssh/authorized_keys && chmod 640 .ssh/authorized_keys
# copy + paste id.pub > .ssh/authorized_keys
# I do this with vim, any editor will do ;-)
vim .ssh/authorized_keys

Make sure your ssh-key is loaded (e.g. with putty pageant) and login to verify it works.

Now I disable logins with passwords via SSH.

sudo vim /etc/ssh/sshd_config

# make sure there is a line with
PasswordAuthentication no

# restart ssh
sudo systemctl restart ssh

Do not logout. Check if everything works as expected first. This way your SSH session remains available to fix things if necessary.

sudo

On my hosts I want to use sudo without password prompts.

sudo visudo

# add the following line, replace 'username' with your login:
username ALL=(ALL) NOPASSWD: ALL

dotfiles

This is where the magic comes in 😉

Managing your dotfiles with git is quite a popular topic for Mac and Linux users. You will find a lot of resources out there. A helpful starting point is https://dotfiles.github.io/ or https://github.com/webpro/awesome-dotfiles

When I started to organize my personal dotfiles I based my repository on the work of Zach Holman.

What are dotfiles good for?

In Unix-like systems files and directories starting with a dot in its name are “hidden” and don’t show by default. That is where the name comes from. Dotfiles store per-user configuration for applications like bash, git, vim and many others.

I prefer to have a consistent configuration across my hosts for the fundamental tools I mentioned above.

Make them rock. Just clone the repo and initialize the environment:

# install git first
sudo apt-get install git

git clone https://github.com/tbaecker/dotfiles.git ~/.dotfiles
~/.dotfiles/bin/dotfiles

Log out and in again. You’re setup.

Dotfiles are a very personal thing. You tweak them the way you want. Check out the various approaches and setups and choose one that fits your expectations. You will have to take some time but once setup it will begin to pay off.

Windows 10 autostart

Windows 10 autostart

Every time I want to change something with my Windows 10 autostart I find myself pondering where the hell do you do this in Windows 10 again?

Next time I know where to look. Here’s how to do it:

Press “windows” + “r”, enter shell:startup and press return or klick “OK”.

This will open an Explorer window in the right directory where you can place links to programs which should start on login.

The path looks like this, replace USERNAME with your actual user name:

C:\Users\USERNAME\AppData\Roaming\Microsoft\Windows\Start Menu\Programs\Startup

Disable dnfdragora-updater in Fedora

Disable dnfdragora-updater in Fedora

dnfdragora-updater is responsible to look for new package updates to your system. By default it is configured to do so every 180 minutes.

The problem is, it will from time to time begin to eat 100% of a cpu core for nothing and slow down the system. So, what can you do about it?

  1. do kill the process if the problem occures
  2. reconfigure dnfdragora to look less frequently (and hope this will resolve or at least mitigate the problem)
  3. disable dnfdragora-updater completely, do package updates by yourself with dnf

Read More Read More

Fedora 30, Virtualbox and libxcrypt

Fedora 30, Virtualbox and libxcrypt

It is a never ending story. New dist release, new problems with Virtualbox.

What is the current problem with a Fedora 30 guest on a Windows host and Virtualbox 6.0.8? Well, the guest additions won’t work, especially vboxadd.service refuses to start.

After asking my search engine of choice it revealed the libxcrypt to be the culprit. There are some changes mentioned at https://fedoraproject.org/wiki/Releases/30/ChangeSet and it is referenced at https://forums.virtualbox.org/viewtopic.php?f=3&t=92953.

Solution:

Install the libxcrypt-compat package and the vboxadd.service will start again, problem fixed.

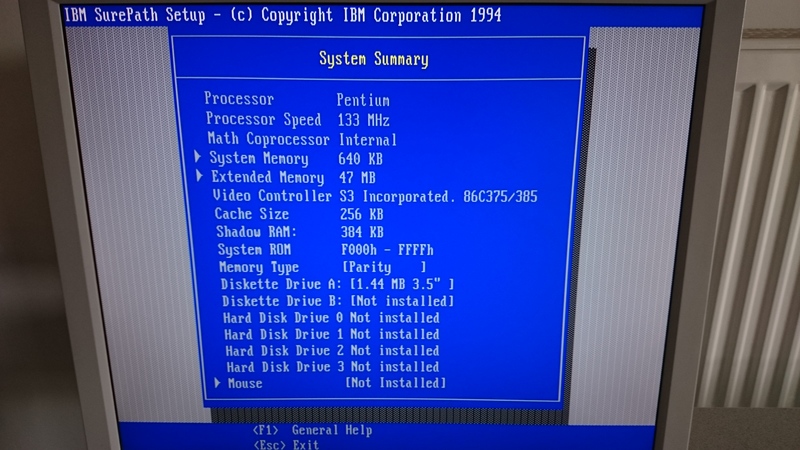
IBM PC Server 310

IBM PC Server 310

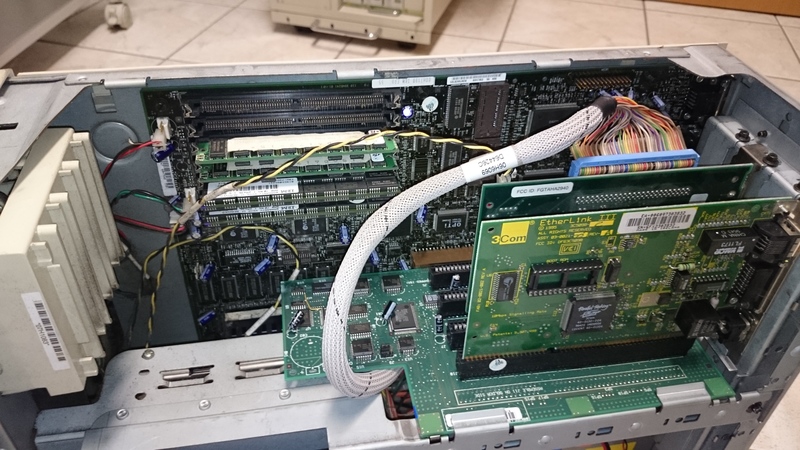
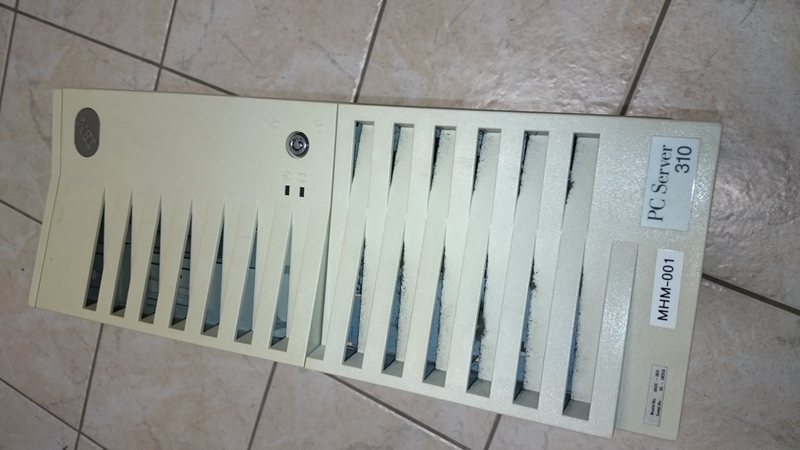
This piece of hardware is from 1996. I found it in our old server room parked under a table next to a box with cables and rack equipment.

And then I remembered the time when I sat in front of it, doing sysadmin stuff with Novell Netware 4.2. Oh my, this was a long time ago!

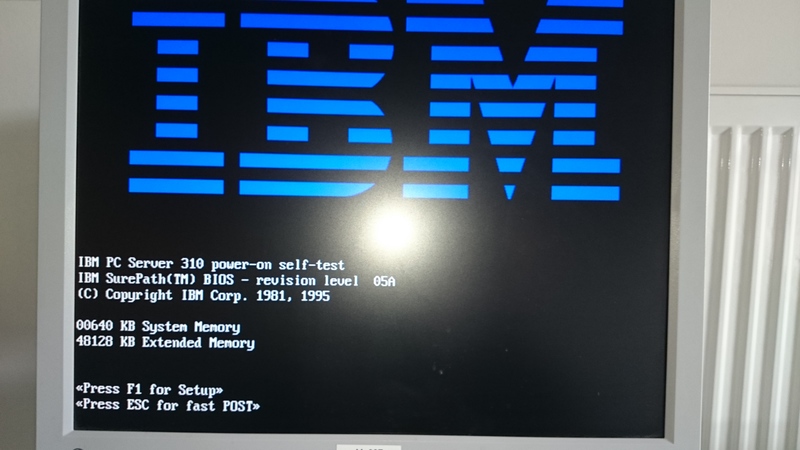
What do you do if you find such a long forgotten treasure? You want to see if it will boot your favorite OS from back then, right? And it booted really fast into a DOS prompt: C:\>

The ver command revealed a Windows 98 installation. After firing win, good old Windows 98 booted into the beloved GUI. I immediately felt 20 years younger 😉

As it turned out, the PC Server was in very good shape, fully functional and booting super fast. Even the CMOS battery was alive. Wow.

Awestruck as I was I shut it down (well, I just hit power-off as in the good old days) and put it back under the table. There it is waiting for someone else cleaning up and wondering if it will boot one more time …

Vagrant cheat sheet

Vagrant cheat sheet

A quick overview of the most useful vagrant commands.

Hint: “ve” means vagrant environment – the virtual machine(s) you run.

CommandRemark
vagrant upstart ve
vagrant haltstop ve
vagrant reloadreload Vagrantfile, restart ve
vagrant destroydestroy ve
vagrant statusshow status of ve(s)
vagrant box listshow local baseboxes
vagrant box add http://local.example.com/vagrant/box.json --box-version 2019.05.04explicitly install a box from the given location and version
vagrant box updateupdate all baseboxes currently installed
vagrant box update --box prefix/boxnameupdate just the given basebox
vagrant box pruneremove outdated baseboxes
vagrant box prune --name prefix/boxnameremove just the given outdated baseboxes
vagrant box remove prefix/boxnameremove all cached instances of the given basebox
vagrant box remove prefix/boxname --box-version 2019.05.04remove just the given basebox and version
vagrant up --provision veprovision the ve with all provisioners (again)
vagrant up --provision-with ansible veprovision the ve with ansible (again)
vagrant reload --provision vereload Vagrantfile, restart the ve and provision it again
vagrant provision veprovision the running ve without restart
vagrant provision --provision-with-ansible veprovision the running ve with ansible and without restart

How to return to a previous version of a vagrant basebox

  1. remove any vagrant environment based on the basebox you want to remove:
    vagrant destroy
  2. remove the basebox:
    vagrant box remove prefix/basebox --box-version xyz
  3. if you already pruned the previous basebox you have to download it again:
    vagrant box add http://local.example.com/vagrant/basebox.json --box-version xyz
  4. check if it is there:
    vagrant box list
  5. create a new vagrant environment:
    vagrant up
Strange mouse behaviour with Fedora 28 in Virtualbox

Strange mouse behaviour with Fedora 28 in Virtualbox

I use Fedora 28 with XFCE as a virtual machine in Virtualbox 5.2.12, hosted on Windows 10.

In full screen mode this works really well.

But suddenly I had huge problems with my left mouse button. In some windows it worked, in others it didn’t and vice versa. After trying random things, it worked for some time, then stopped again. Or didn’t work at all.

The system was actually unusable any more.

It took some time until I realized this strange behaviour was caused by the latest kernel update to 4.17

As soon as it was clear I just had to use the old 4.16 kernel the next steps where easy.

Read More Read More

Certbot, a Let’s Encrypt Client

Certbot, a Let’s Encrypt Client

I have been using Let’s Encrypt SSL/TLS certificates since they where available in open beta. Because back then there wasn’t any packaged client to obtain your certs I went with the letsencrypt and later certbot Github vanilla install.

That worked very well but is was a little bit cumbersome. The benefit was primarily to be up to date with the latest version and features.

In Mai 2016 the letsencrypt client became “certbot

certbot vanilla install via git

cd /opt
git clone https://github.com/certbot/certbot.git

Obtain a new certificate in webroot mode:

cd /opt/certbot
./certbot-auto certonly -a webroot --webroot-path /var/www/letsencrypt \
-d www.example.com -d example.com \
--agree-tos --text --non-interactive --email hostmaster@example.com

To renew, run:

# renew not earlier than 30 days before expiry
/opt/certbot/certbot-auto renew

To update certbot and pull in any changes just run git:

cd /opt/cerbot
git pull

Over time, your local clone of certbot clutters with stale branches. That’s not really a problem. But if you want it tidy you might run an occasional git remote prune origin after your pull.

Today certbot is available in all major Linux distributions.
But if you want the latest and greatest it might be necessary to pick a specific repository.

Ubuntu 16.04 with the latest certbot

In Ubuntu Xenial aka 16.04 there is an PPA with up to date versions available. To install, run:

apt-get update
apt-get install software-properties-common
add-apt-repository ppa:certbot/certbot
apt-get update
apt-get install certbot

This package installs a very convenient cronjob which takes care of automatic cert renewal:

# /etc/cron.d/certbot: crontab entries for the certbot package
#
# Upstream recommends attempting renewal twice a day
#
# Eventually, this will be an opportunity to validate certificates
# haven't been revoked, etc.  Renewal will only occur if expiration
# is within 30 days.
SHELL=/bin/sh
PATH=/usr/local/sbin:/usr/local/bin:/sbin:/bin:/usr/sbin:/usr/bin

0 */12 * * * root test -x /usr/bin/certbot -a \! -d /run/systemd/system && perl -e 'sleep int(rand(43200))' && certbot -q renew

This cronjob reliably renews any due certificates. Awesome.

Configure Windows keyboard shortcuts in XFCE

Configure Windows keyboard shortcuts in XFCE

My windows manager of choice for Linux is XFCE.

While working in XFCE I realized that I got so accustomed to the Windows 10 keyboard shortcuts for tiling windows, I wanted to have the same functionality in XFCE.

And it is no problem to make that happen.

Just go to Settings -> Windows Manager -> select the Keyboard tab. Then scroll down to “Tile windows to the …”, mark the entry you want to change and click the “Edit” button. Follow the instructions.

To tile the window to the left enter: <Super(Windows key)> + <left arrow>